配置:甲骨文ARM4+24
系统:debian 12 X64
宝塔版本:8.0.2
一、安装宝塔及运行环境
略
二、安装Hexo
1.软件商店安装Node.js
打开软件商店,安装Node.js,设置选择稳定版本(只显示LTS版本),安装v18.17.1(如安装其他版本注意之后命令同时更换版本名称),安装完成后选择命令行版本。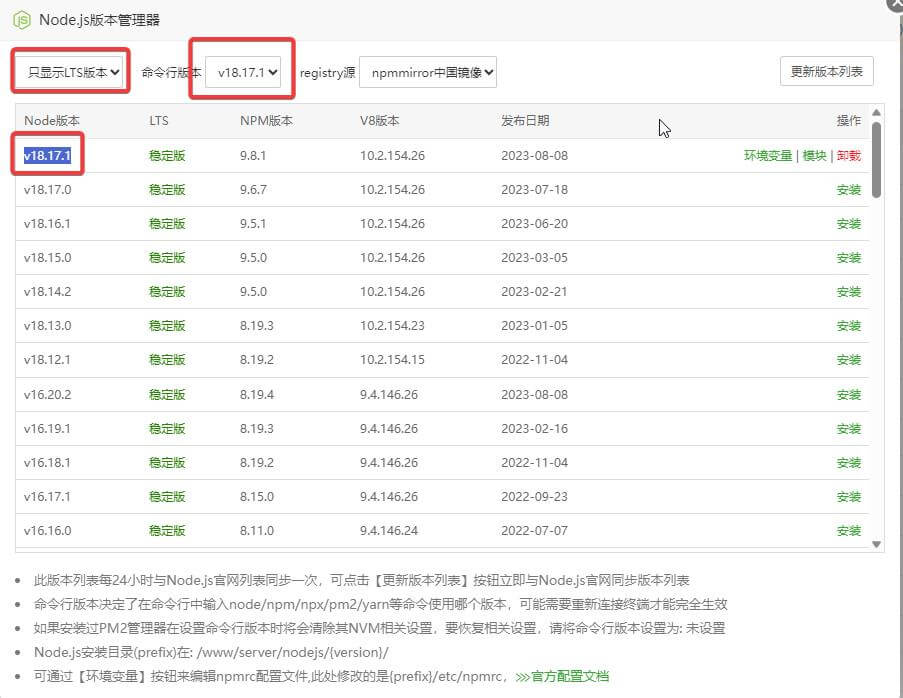
安装后可npm -v 和node -v查看版本,验证是否成功。
2.宝塔添加站点(example.com)
BT管理页面-网站-添加网点,做好域名解析,并选择创建MySQL备用。
删除/www/wwwroot/example.com下自动生成的文件,保持为空目录。
3.安装Hexo
npm install hexo -g
ln -s /www/server/nodejs/v18.17.1/lib/node_modules/hexo/bin/hexo /usr/bin/hexo #命令软连接
4.初始化Hexo
进入/www/wwwroot/example.com目录进行初始化
hexo init
hexo g
5.本地运行网站
网站设置-运行目录-/public-运行
进入/www/wwwroot/example.com目录运行
hexo s5-1.其他本地运行方式
BT管理页面-网站-Node项目-添加Node项目
项目目录:/www/wwwroot/example.com/
项目名称:随意
启动选项:hexo server
端口:4000
域名:自行填写并解析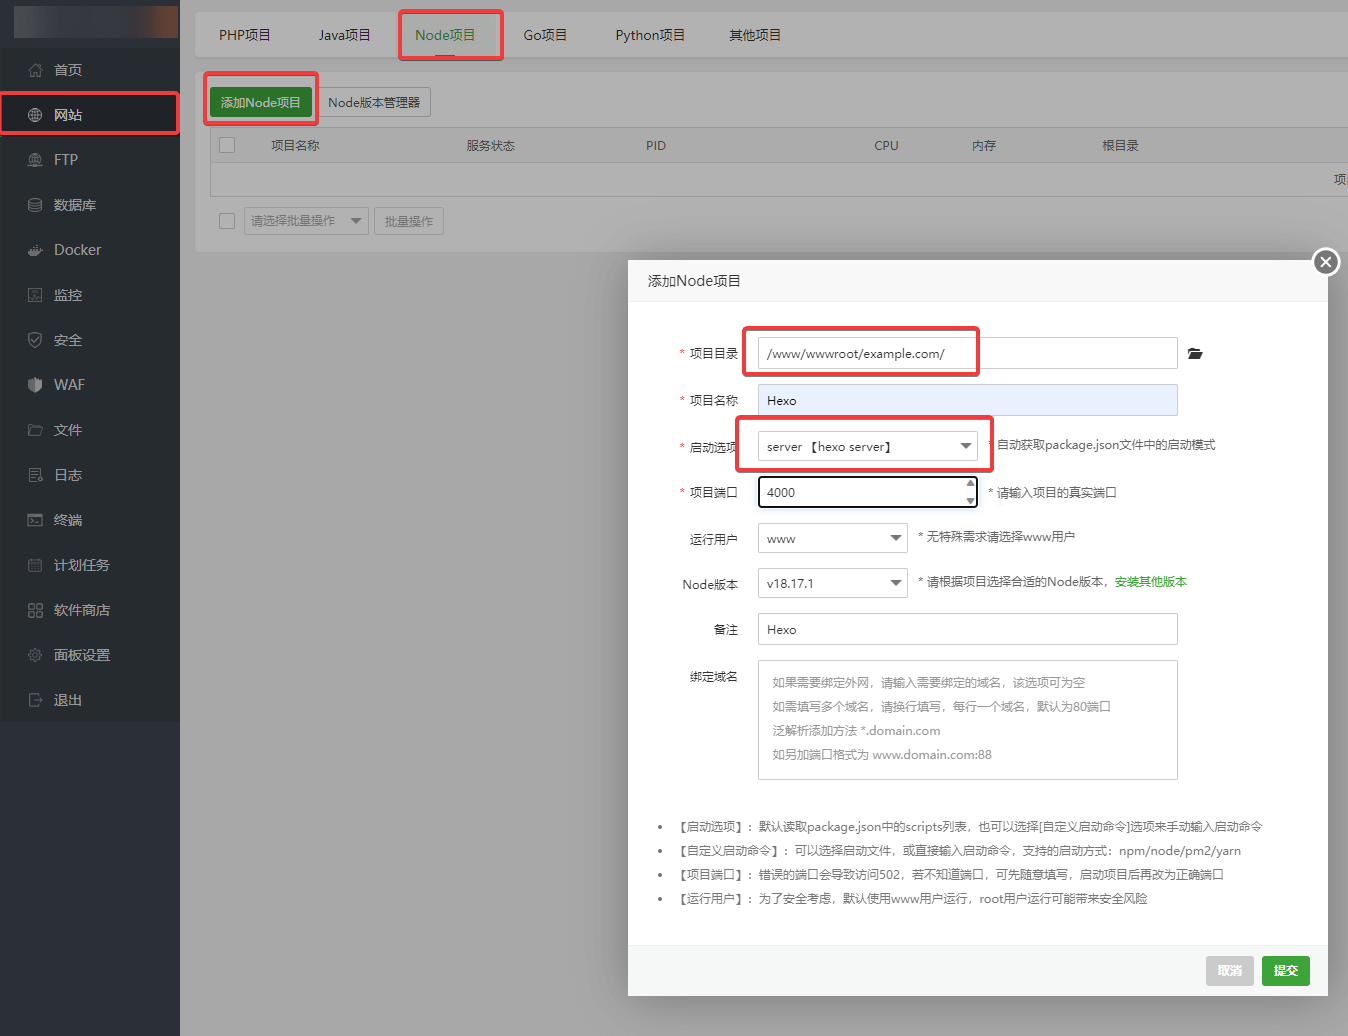
访问 http://域名
6.进程守护
npm install pm2 -g #安装PM2在 /www/wwwroot/example.com 目录创建文件 hexo_run.js 内容为
//run
const { exec } = require('child_process')
exec('hexo server & ',(error, stdout, stderr) => {
        if(error){
                console.log('exec error: ${error}')
                return
        }
        console.log('stdout: ${stdout}');
        console.log('stderr: ${stderr}');
})
pm2 start hexo_run.js #运行脚本
pm2 list #可查看进程守护情况7.其他情况
如果npm -v提示npm WARN config init.module Use --init-module instead.错误
修改/www/server/nodejs/v18.17.1/etc/npmrc 文件中 init.module 为 --init-module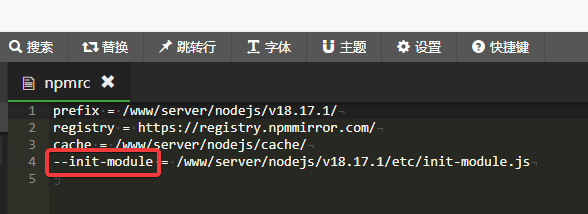
二、后台管理
1.hexo-admin
https://github.com/jaredly/hexo-admin
进入安装目录/www/wwwroot/example.com运行
npm install --save hexo-admin
hexo clean && hexo g
访问http://域名/admin
添加密码保护:
选择Settings-Setup authentification here
设置用户名及密码,粘贴下面的配置至/www/wwwroot/example.com/_config.yml 文件中
hexo clean && hexo g2.Hexon(中文在线hexo博客编辑器)
gethexon/hexon: Let's hexo online. (github.com)
cd /www/wwwroot/example.com
git clone https://github.com/gethexon/hexon
cd hexon
pnpm install
pnpm run setup

#不使用pm2

pnpm start

#使用pm2

pnpm prd
选择端口默认5777
访问
http://IP:5777
三、安装主题
选择了个应该还在更新的中文主题
https://github.com/fi3ework/hexo-theme-archer
1.拉取主题文件
git clone https://github.com/fi3ework/hexo-theme-archer.git /www/wwwroot/example.com/themes/archer --depth=12.复制主题配置文件
cp /www/wwwroot/example.com/themes/archer/_config.yml /www/wwwroot/example.com/_config.archer.yml
mv /www/wwwroot/example.com/themes/archer/_config.yml /www/wwwroot/example.com/themes/archer/_config.yml.template修改/www/wwwroot/example.com/_config.yml 文件中 theme: landscape为 theme: archer
进入/www/wwwroot/example.com目录运行
hexo clean && hexo g主题配置修改 /www/wwwroot/example.com/_config.archer.yml
主题配置中文参考
四,Github集成部署
Hexo根目录下,提前安装Git命令:
npm install hexo-deployer-git --save1.创建Github库
Repository name 中输入仓库名称 yourname.github.io - 仓库类型为Public - Create repository
注意:Repository name的名称要和你Github的用户名相同,即和前面的Owner的名字相同。2.创建令牌
Personal Access Tokens (Classic) (github.com) - Generate new token - Generate new token(classic) - Note随意 - Expiration选择No expiration(不过期,根据情况自行确定) - 选中repo - Generate token - 记住密钥内容
workflow 也可选中,可用作以后GitHub Actions自动部署使用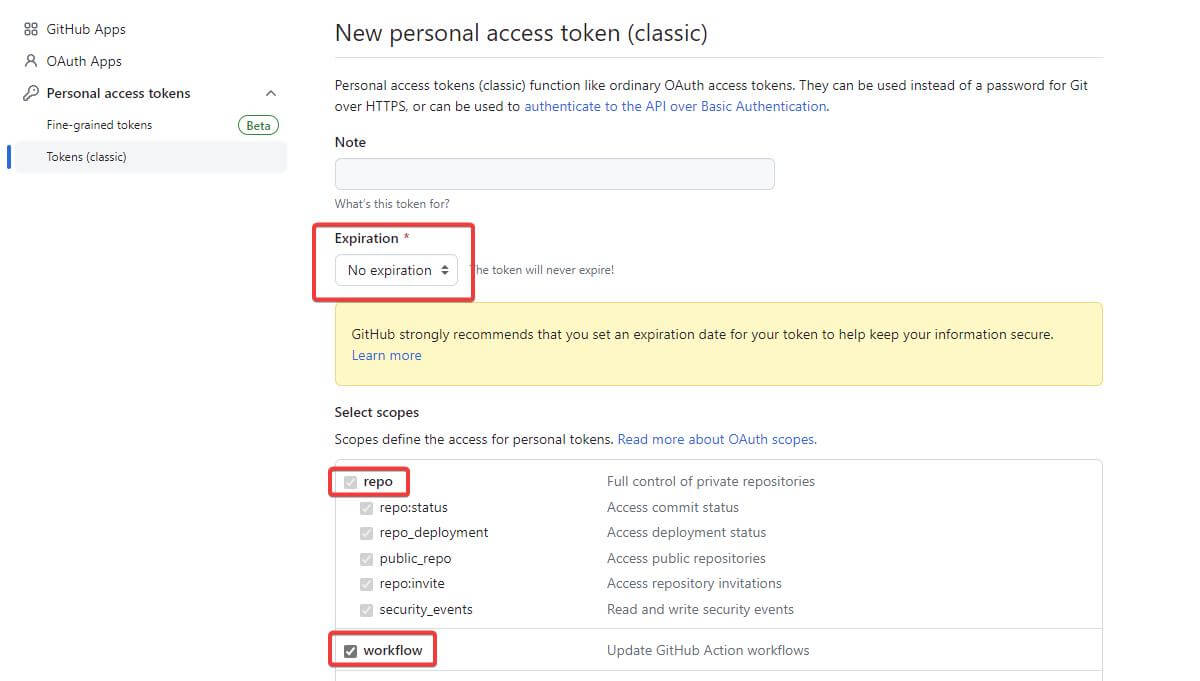
3.本地上传至Github
编辑/www/wwwroot/example.com/_config.yml,将最后的deploy更改为以下内容
deploy:
  type: 'git'
  repo: https://token@github.com/yourname/yourname.github.io.git
  branch: main
hexo clean && hexo g && hexo d如出现ERROR Deployer not found: git错误,运行npm install hexo-deployer-git --save
如出现Please tell me who you are错误,运行
git config --global user.email "you@example.com"git config --global user.name "Your Name"
明确身份。
四、安装QEXO(暂时未成功,预留)
1.安装python
BT管理页面-软件商店-安装Python项目管理器(当前版本号为2.5.1)
安装完毕后,软件商店已安装中找到Python项目管理器2.5.1,设置-版本管理-安装版本(当前安装的是3.9.7版本,其他版本自行测试)
软连pip3
ln -s /www/server/panel/pyenv/bin/pip3 /usr/bin/pip3
进入/www/wwwroot/example.com目录(也可以是其他目录,此处为我方便管理)拉取
git clone https://github.com/Qexo/Qexo.git
cd Qexo
pip3 install -r requirements.txt